Battle animation tutorial
This tutorial is made for RPG Maker MV, but it's possible that other versions work similarly. I won't teach you how to draw or how to use a drawing program, you should know that or investigate on your own. I will explain how battle animations work in the engine and some tips I personally use.
Index
- Images
- Editor inside RPG Maker
- Advanced: trick to make bigger animations
- Advanced: changing animation speed
Images
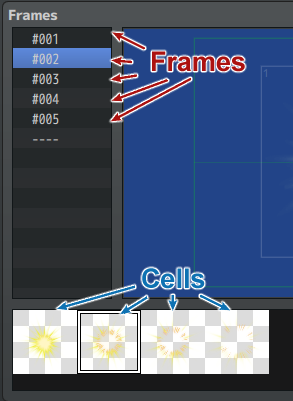
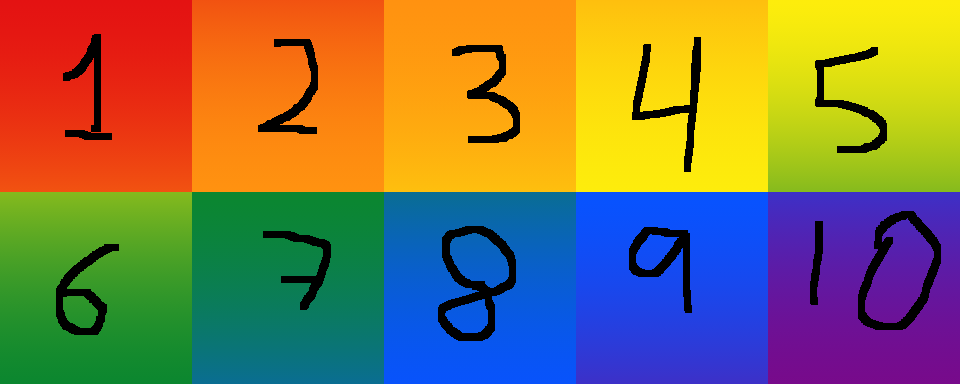
To start I will clarify that I will use the word "cell" (animation cell) for each different drawing that we can use in an animation, and "frame" for each time measurement that these drawings are seen on screen. In a different context I could call "frame" a "cell", but it would be confusing for this guide.
Battle animation cells must be arranged in a sheet (same thing as sprites, though with a different structure).
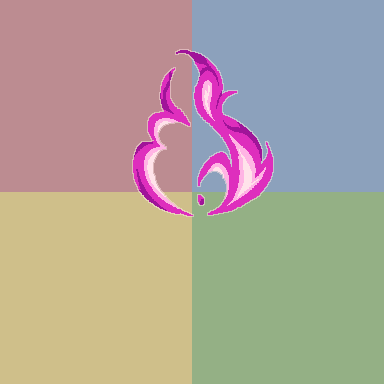
You must save these images in your project folder > img > animations. You will notice that RTP images (default assets) have different sizes. This is because they have a maximum limit, but images can be smaller or bigger, depending on what you need. See an example, Claw.png (I changed the background so you can tell the cells apart, but it should be transparent).
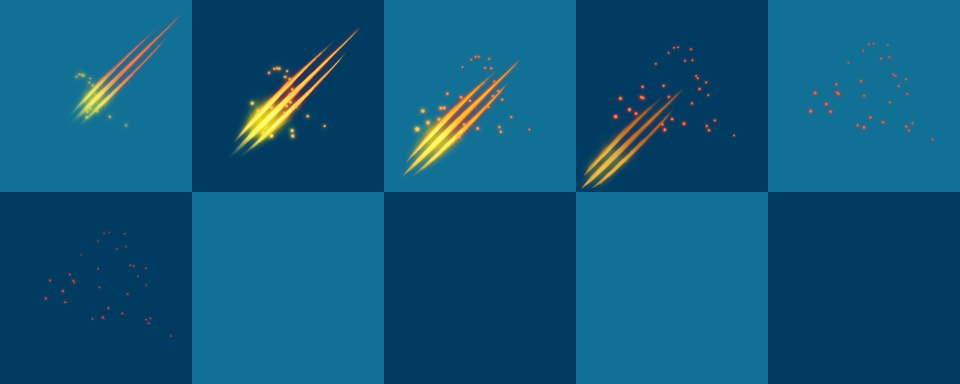
Each cell has a size of 192 x 192 pixels.
(If you think that this is very small, you are right. Check the trick
in the advanced part if you're interested in making them bigger).
Every sheet has a maximum of 5 columns and 20 rows.
This makes a total of 860 x 3840 pixels.
That makes 100 cells.
Each animation inside the engine can use two of these sheets, so you can use 200 cells total.
By the way, this has nothing to do with animation images, but if you're making your own graphics it's possible that you will encounter this problem. Your enemy images must have an even number of pixels. If the numbers are odd, your animations will look blurry, which is very noticeable if your style is pixel art.
Editor inside RPG Maker
This explanation is summarized information from this post, which is where I learned about it. It's for MZ, where you can choose between the new system and the MV one, so naturally it also works for MV.
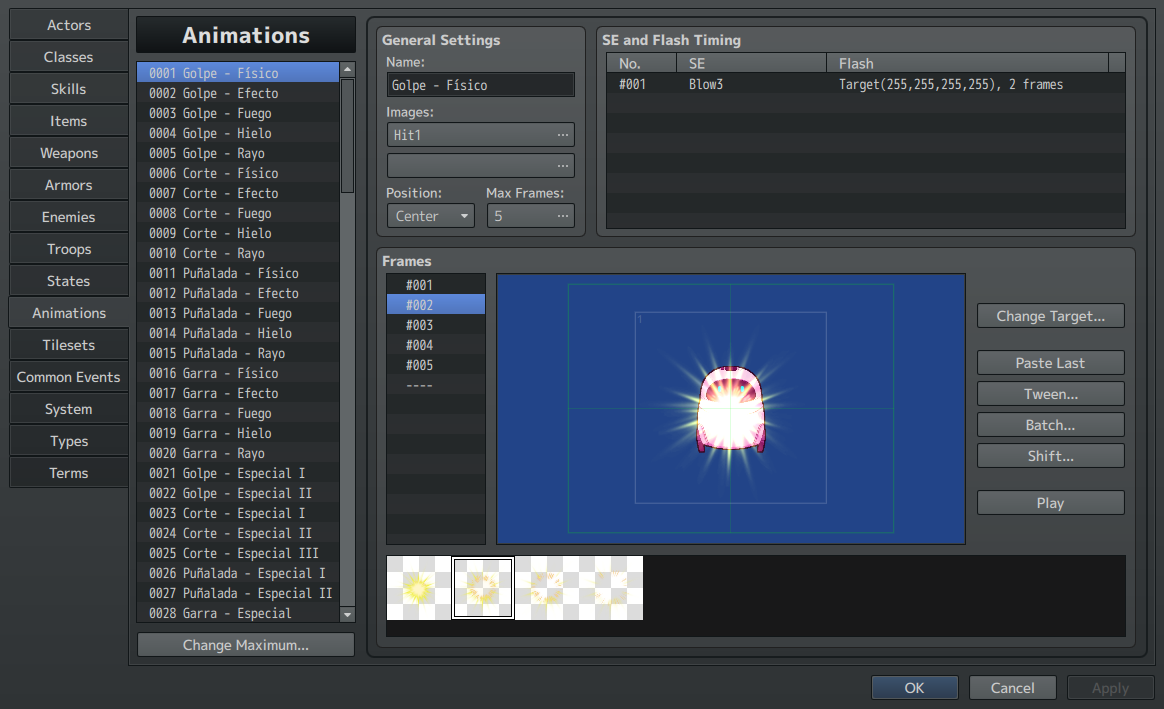
In general settings you can name your animation, choose up to two sheets that you're going to use, the maximum frames your animation will have (which you can change as you go) and the position it will take in relation to the enemy (head, center, feet, or the whole screen).
I'm not gonna lie. The editor is not super comfortable to use. In the advanced part of this guide I'll give you an advice about this, but for now you need to know how everything works.
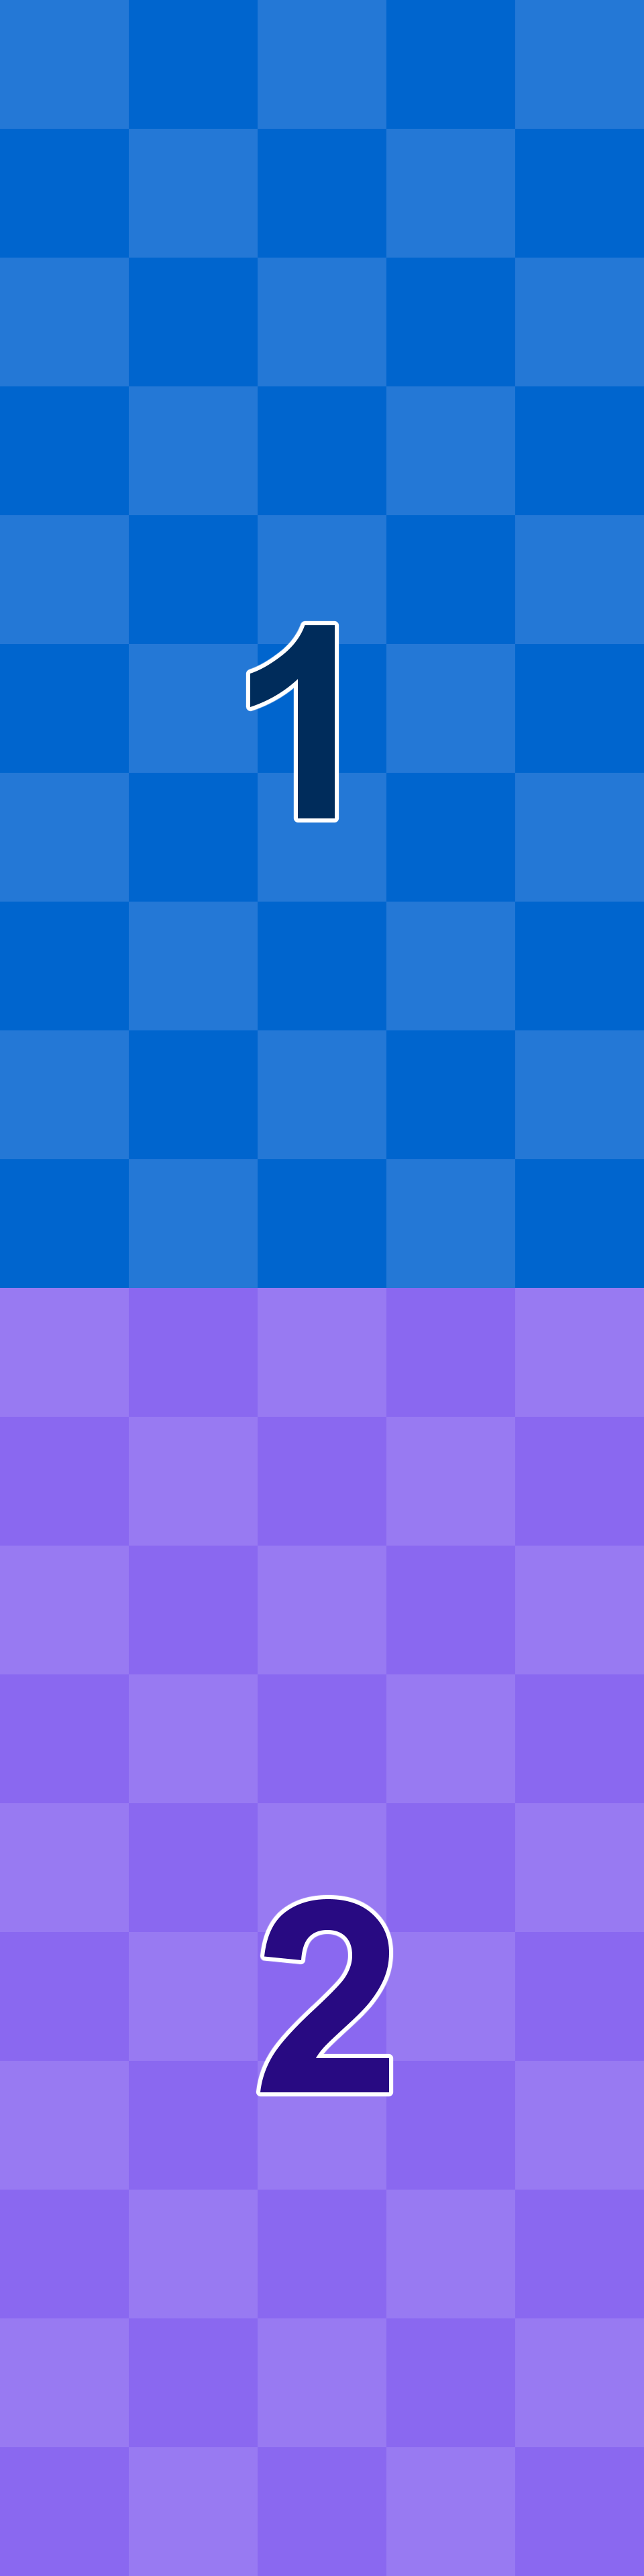
First select a cell in the bar at the bottom. To add it to your animation, double click, or right click > new, or press Ctrl N. Look how you can see a number 1 in a corner of this cell. This is because this is the cell 1 of this frame (regardless of what its position is in the sheet). If you add another one, it would show a 2, with a maximum of 16.
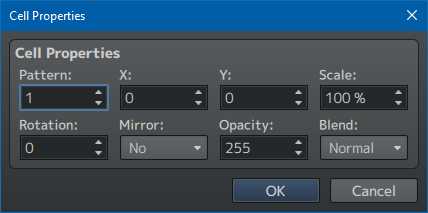
By default it will look bright, this is because it gets added with the "additive" blend mode. If you double click this already placed cell, or right click > edit, you will see its properties.
-
Pattern means the cell you have selected from the sheet, in this case 1 because it's the first.
-
X and Y are the positions in relation to the center. If you want to center your cell, make these two 0.
-
Scale is obvious. For now leave it at 100%. It's not bad to change it, but if your style is pixel art I will warn you that it will look wrong, as it becomes blurry. If you need to change the size of each cell and you use such a style, you should consider making a different cell for each size in your art program.
-
Rotation is also obvious and it has the same problem as scale.
-
Mirror reverses the image.
-
Opacity 255 is the maximum.
-
Blend is what we want to change right now. Unless you like additive, set it to normal.
If you select the next frame in the bar on the left side, you will be able to add another cell, and edit each cell you add in this way until your animation turns how you want. As a guide, you can see the previous frame with a lower opacity, so you can align everything properly.
However, this is very tedious, even for RPG Maker standards. This is why tweening, batch and shift exist. I personally think that tweening is the most useful of the three, but it depends on what you want to do.
Let's imagine an animation that goes from the first cell to the tenth cell, and we want each cell to be seen in one frame for a total duration of 10 frames.
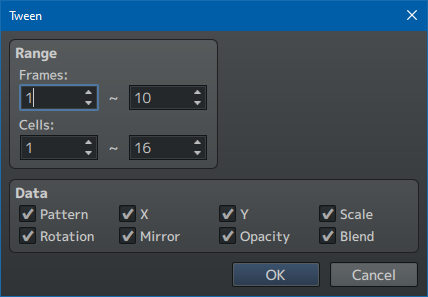
Simply add the first cell in the way I said before, and do the same with the cell 10 on frame 10, then press tweening. In range, choose 1-10 frames, and choose the cell 1 (though you can leave it at 16. Since you only have 1 cell it won't change anything). By default, all boxes are checked, but the one we're interested in is pattern. Press OK and now frame 2 has cell 2, frame 3 has cell 3... all the way to 10.
In case that frame 10 had its cell in a 200% scale and we used tweening, each frame it would get gradually bigger. In case that the Xs and Ys had different values, it would do the same. It works like this with every property.
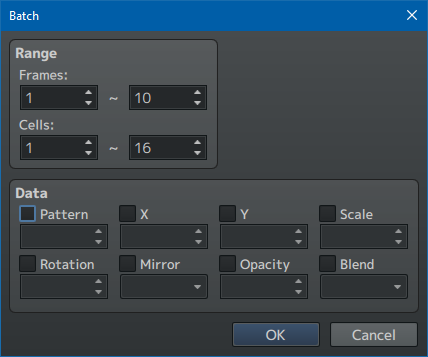
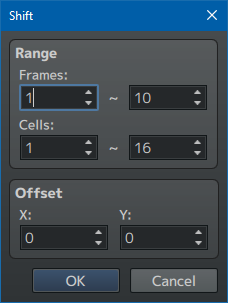
Batch and shift work similarly. With batch, you can choose the frames and cells you want to edit in bulk, giving them a specific value (for example, X = 10, Y = -5). Meanwhile, with shift you can only move X and Y, but instead of giving them an absolute value, you can add or substract. That is, if you write X = 3, it will get added to our previous 10, resulting in 13. And if you write Y = 0, the Y will stay in -5.
In any case, if your method consists on animating outside of RPG Maker and adding later, tweening is enough for you. I recommend this way, since editing in RPG Maker isn't super comfortable (and many of these options, like scale or rotation, don't work for pixel art). But every project has different needs.
Last but not least, you can add sounds and flashes in any frame you want, but I think this option is intuitive enough that I don't have to explain it. Simply add an entry, select the frame where you want the sound and/or flash to start, and choose what you want.
Advanced: trick to make bigger animations
This trick was an idea Cupcakes gave me, and it's what I use for my game.
The 192x192 limit is quite small, and making every cell 200% size makes it blurry, which is awful for pixel art. By the way, this blur problem is present in MV, VXAce uses the nearest neighbor algorithm. But if you still don't like how they look, or you still want bigger animations with no scaling, you can use this trick in VXAce as well.
What I do is create a 384 x 384 square in my art program (that is, like four 192 x 192 squares forming a bigger square), draw the animation there, and then export each corner separately.
But you will remember that you can only use 2 sheets. The idea is to place two of these four corners in each sheet. This way, we have 50 frames available, which is more than enough space.
Besides, another trick to speed this process is to create a template. Normally, you would optimize sheets, just like RTP does, which is: if you only need 10 frames, you would make a sheet with 2 rows and crop the image there. But if you use all the available height of a sheet (3840 pixels)...
You can divide your sheet in two zones. In the first 50 cells, you place the upper left corner of your animation. In the second 50 cells, the upper right corner. Then in a new sheet, you do the same with the lower left and right corners.
Then, now in RPG Maker, you just have to place every corner in its appropriate position, tween each corner from cell 1 to 50 (and the next corner from cell 50 to 100). And now, when you need any actual animation, you only have to copy this template in your database and change the sheet images. Your animation will most likely be shorter than 50 frames, in which case you only have to adjust this. And there you have it, you only have to work once.

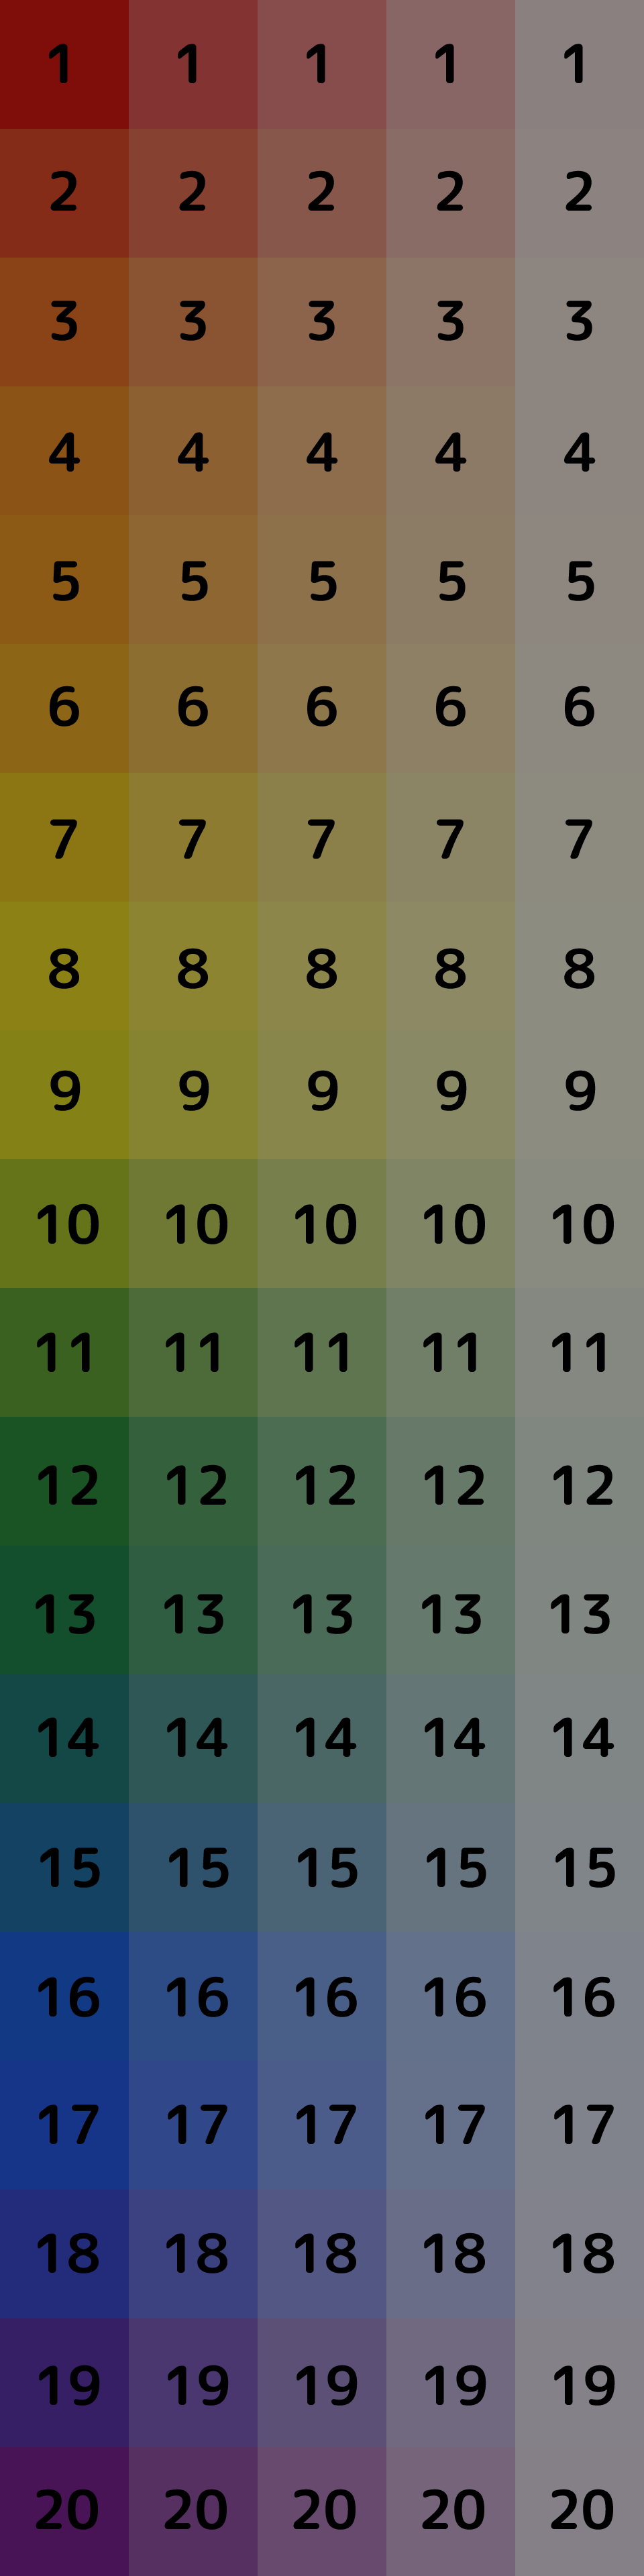
I made this template sheet, with a new tone every 5 cells (it doesn't match with the other screenshots because I made a prettier one for my project, sorry for the inconsistency). You can make your own if you want, it's just a way to make sure that I placed everything correctly after tweening.

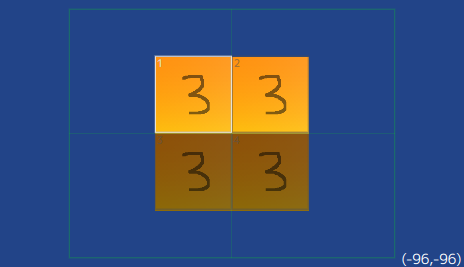
And while I'm here, I'll tell you the Xs and Ys of each corner (each zone of our bigger animation) so they're centered.
- Upper left corner: X -96, Y -96
- Upper right corner: X 96, Y -96
- Lower left corner: X -96, Y 96
- Lower right corner: X 96, Y 96
Of course, this template idea can also help if, instead of 4 cells forming a bigger square, you use only one. It's just a way of not having to touch a lot of the RPG Maker animation system and only worrying about it in your art program.
You can also make different shapes, like 3 squares forming a wide or tall rectangle. Or even more than 4 squares (but then you will have fewer than 50 frames available). The only thing you need to have in mind is that, for every new shape you create, you will need a different template. But if you use tweening and batch you won't necessarily take too long.
Advanced: changing animation speed
By default every battle animation in RPG Maker plays at 15 frames per second. If you want to change this, you need a plugin. You can use my plugin BF_cosas, and there are surely other plugins that do the same, but I'm going to explain the code in case you want to add it to your game with your own plugin, since it's not too hard.
If you open a .js file (you can make it by creating a txt file and changing the extension) copy this. It's better if you use a program like Visual Studio Code or Notepad++.

Sprite_Animation.prototype.setupRate = function() {
this._rate = 4;
};
We want to replace Sprite_Animation.prototype.setupRate, so you can go to the game files (rpg_sprites.js) and change it there, but it's not recommended. Creating a .js file and adding it to your plugin folder is a better idea.
By default the number that appears there is 4, not 15. This is because the game goes at 60 frames per second, so each block of 60 frames gets divided into 4, in which every time measurement (frames) of animations get shown on screen. And 60 divided by 4 gives you 15: which means, the animation is played at 15 frames per second.
Don't worry if you didn't understand, it's also a little weird to me. The thing is that this._rate uses a number that isn't literally frames per second, so if you're thinking in frames per second you need to calculate. And it's very easy. 60 divided by [number of frames per second you want] = number you need to write here.
This function can't use decimal numbers, so if you choose a number by which 60 isn't divisible, you'll have to round up or down. For example, I chose 8fps, which would give us 7.5. But I wrote 7 in this._rate. The lower the number is in this._rate, the faster the animation will play. In my case, I liked the value 7 more than the value 8 when I tried both.
My plugin makes this "fps > number inside the code" calculation automatically, rounding down (so if the number isn't divisible, the animation will go a little faster, like in my case).
Important: this fps change won't be visible in the in-editor animation preview. This will still play at 15fps. But if you try a battle (in playtest), you will see that the speed has changed. If you're not sure it works, try writing a very different number from 4 and you will notice.
And that's it for the battle animation tutorial. If I learn something new, I may add it. It's also possible that I made a mistake somewhere, in which case please tell me. But I hope it was helpful. And if you want to thank me... you can always donate, or play my game, which is free.